v2ray 梯子实现公司局域网全局自动匹配实现梯子
前言
这篇文章基于上两篇文章而成
SS 最佳的替代品,从 0 开始部署 v2ray 梯子(1)
SS 最佳的替代品,从 0 开始部署 v2ray 梯子(2)
因为前段时间公司有几个外国友人来开会,问道:我怎么上不了 google 呀?我要查资料的呀。
后来因为临近公司搬家,没去管这事,现在公司搬完家了,着手搞这个连上公司无线网络后自动就能适配规则来实现梯子功能。
准备工作
在公司无线网络同网段下,接入一台 Centos7 系统的服务器(我这里用虚拟机代替,视之为 网关设备),IP 为 10.18.30.20
初步配置
网关设备上关闭 firewalld 和 selinux,安装 iptables,优化内核参数,校准时间等
[root@dev-of-v2ray-20 ~]# yum -y install iptables-services
[root@dev-of-v2ray-20 ~]# systemctl stop firewalld && systemctl disable firewalld && systemctl start iptables && systemctl enable iptables
[root@dev-of-v2ray-20 ~]# sed -i 's/SELINUX=enforcing/SELINUX=disabled/g' /etc/selinux/config
[root@dev-of-v2ray-20 ~]# cat >> /etc/security/limits.conf <<EOF
> * - nofile 65535
> * - nproc 65536
> EOF
[root@dev-of-v2ray-20 ~]# sed -i 's#4096#65536#g' /etc/security/limits.d/20-nproc.conf
[root@dev-of-v2ray-20 ~]# (crontab -l;echo '*/30 * * * * /usr/sbin/ntpdate ntp1.aliyun.com && /usr/sbin/hwclock -w') | crontab
[root@dev-of-v2ray-20 ~]# echo '*/30 * * * * root /usr/sbin/ntpdate ntp1.aliyun.com && /usr/sbin/hwclock -w' >> /etc/crontab
[root@dev-of-v2ray-20 ~]# /usr/sbin/ntpdate ntp1.aliyun.com && /usr/sbin/hwclock -w
[root@dev-of-v2ray-20 ~]# cat >> /etc/sysctl.conf <<EOF
> net.ipv4.ip_forward = 1
> net.ipv4.tcp_fin_timeout = 2
> net.ipv4.tcp_tw_reuse = 1
> net.ipv4.tcp_tw_recycle = 1
> net.ipv4.tcp_syncookies = 1
> net.ipv4.tcp_keepalive_time = 600
> net.ipv4.ip_local_port_range = 4000 65000
> net.ipv4.tcp_max_syn_backlog = 16384
> net.ipv4.tcp_max_tw_buckets = 36000
> net.ipv4.route.gc_timeout = 100
> net.ipv4.tcp_syn_retries = 1
> net.ipv4.tcp_synack_retries = 1
> net.core.somaxconn = 16384
> net.core.netdev_max_backlog = 16384
> net.ipv4.tcp_max_orphans = 16384
> net.netfilter.nf_conntrack_max = 25000000
> net.netfilter.nf_conntrack_tcp_timeout_established = 180
> net.netfilter.nf_conntrack_tcp_timeout_time_wait = 120
> net.netfilter.nf_conntrack_tcp_timeout_fin_wait = 120
> EOF
[root@dev-of-v2ray-20 ~]# sysctl -p >/dev/null 2>&1
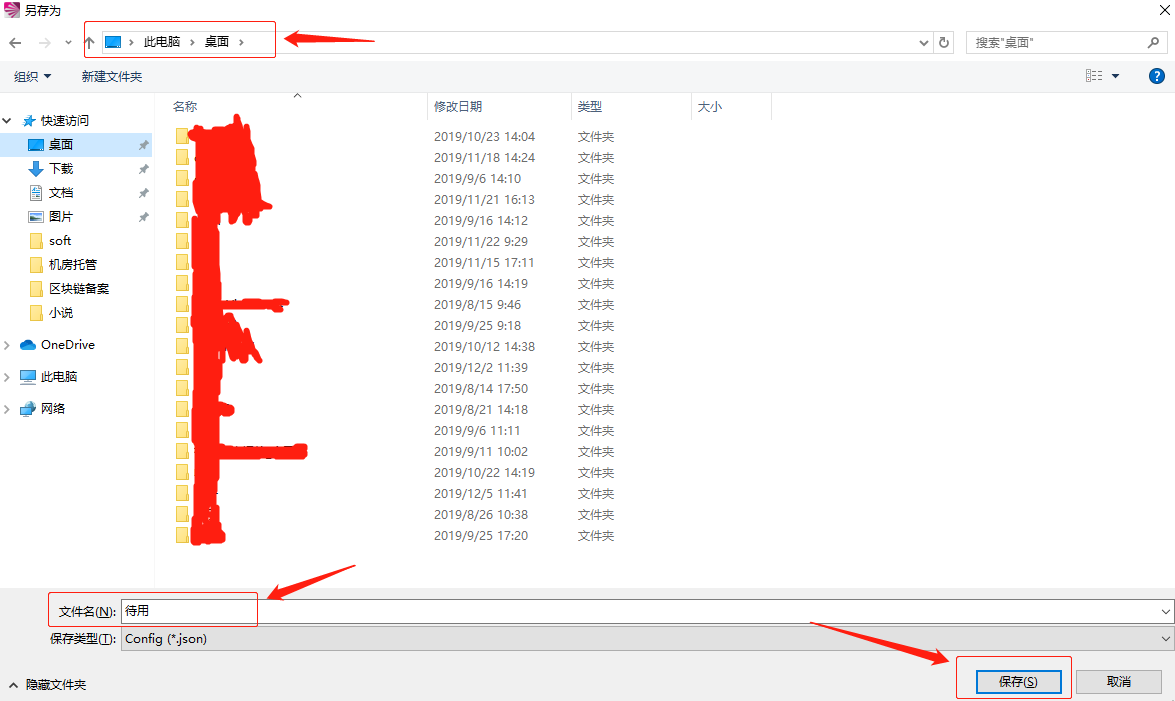
根据 SS 最佳的替代品,从 0 开始部署 v2ray 梯子(2) 所配置好的客户端,导出配置文件待用

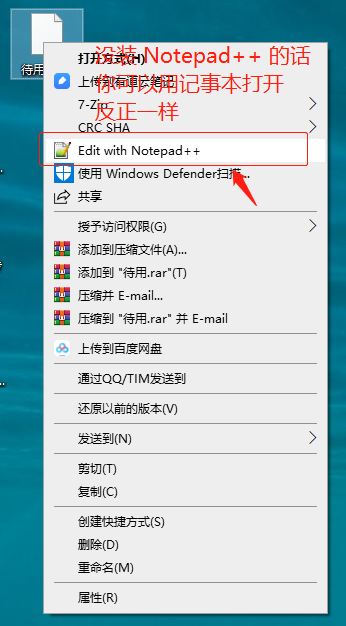
网关设备上安装 v2ray 客户端,同时把修改过的客户端配置文件内容粘贴进去并启动 v2ray 客户端
[root@dev-of-v2ray-20 ~]# cd /usr/local/src/
[root@dev-of-v2ray-20 src]# curl -O https://raw.githubusercontent.com/v2fly/fhs-install-v2ray/master/install-release.sh && curl -O https://raw.githubusercontent.com/v2fly/fhs-install-v2ray/master/install-dat-release.sh
[root@dev-of-v2ray-20 src]# bash install-release.sh && bash install-dat-release.sh
[root@dev-of-v2ray-20 src]# vim /usr/local/etc/v2ray/config.json
{
  "inbounds": [
    {
      "tag":"transparent",
      "port": 12345,
      "protocol": "dokodemo-door",
      "settings": {
        "network": "tcp,udp",
        "followRedirect": true
      },
      "sniffing": {
        "enabled": true,
        "destOverride": [
          "http",
          "tls"
        ]
      },
      "streamSettings": {
        "sockopt": {
          "tproxy": "tproxy" // 透明代理使用 TPROXY 方式
        }
      }
    },
    {
      "port": 1080,
      "listen": "0.0.0.0",
      "protocol": "socks", // 入口协议为 SOCKS 5
      "sniffing": {
        "enabled": true,
        "destOverride": ["http", "tls"]
      },
      "settings": {
        "auth": "noauth"
      }
    }
  ],
  "outbounds": [
    {
      "tag": "proxy",
      "protocol": "vmess", // 代理服务器
      "settings": {
        "vnext": [
          {
            "address": "www.itwordsweb.top", //把所有域名改成你自己的 v2ray 域名
            "port": 443,
            "users": [
              {
                "id": "XXXXXX", //改成你自己的 id
                "alterId": 64,
                "email": "t@t.tt",
                "security": "aes-128-gcm"
              }
            ]
          }
        ]
      },
      "tag": "top",
      "streamSettings": {
        "sockopt": {
          "mark": 255
        },
        "wsSettings": {
          "path": "/top",
          "headers": {
            "Host": "www.itwordsweb.top"
          }
        },
        "quicSettings": {
          "key": "",
          "header": {
            "type": "none"
          },
          "security": "none"
        },
        "tlsSettings": {
          "allowInsecure": false,
          "alpn": ["http/1.1"],
          "serverName": "www.itwordsweb.top",
          "allowInsecureCiphers": false
        },
        "httpSettings": {
          "path": "/top", //改成你自己 path
          "host": ["www.itwordsweb.top"]
        },
        "kcpSettings": {
          "header": {
            "type": "none"
          },
          "mtu": 1350,
          "congestion": false,
          "tti": 20,
          "uplinkCapacity": 5,
          "writeBufferSize": 1,
          "readBufferSize": 1,
          "downlinkCapacity": 20
        },
        "tcpSettings": {
          "header": {
            "type": "none"
          }
        },
        "security": "tls",
        "network": "ws"
      }
    },
    {
      "tag": "direct",
      "protocol": "freedom",
      "settings": {
        "domainStrategy": "UseIP"
      },
      "streamSettings": {
        "sockopt": {
          "mark": 255
        }
      }
    },
    {
      "tag": "block",
      "protocol": "blackhole",
      "settings": {
        "response": {
          "type": "http"
        }
      }
    },
    {
      "tag": "dns-out",
      "protocol": "dns",
      "streamSettings": {
        "sockopt": {
          "mark": 255
        }
      }
    }
  ],
  "dns": {
    "servers": [
      "8.8.8.8", // 非中中国大陆域名使用 Google 的 DNS
      "1.1.1.1", // 非中中国大陆域名使用 Cloudflare 的 DNS(备用)
      "114.114.114.114", // 114 的 DNS (备用)
      {
        "address": "223.5.5.5", // 中国大陆域名使用阿里的 DNS
        "port": 53,
        "domains": [
          "geosite:cn",
          "ntp.org", // NTP 服务器
          "www.itwordsweb.top" // 此处改为你的域名
        ]
      }
    ]
  },
  "routing": {
    "domainStrategy": "IPOnDemand",
    "rules": [
      { // 劫持 53 端口 UDP 流量,使用 V2Ray 的 DNS
        "type": "field",
        "inboundTag": [
          "transparent"
        ],
        "port": 53,
        "network": "udp",
        "outboundTag": "dns-out"
      },
      { // 直连 123 端口 UDP 流量(NTP 协议)
        "type": "field",
        "inboundTag": [
          "transparent"
        ],
        "port": 123,
        "network": "udp",
        "outboundTag": "direct"
      },
      {
        "type": "field",
        "ip": [
          // 设置 DNS 配置中的国内 DNS 服务器地址走代理,以达到 DNS 分流目的
          "8.8.8.8",
          "1.1.1.1"
        ],
        "outboundTag": "proxy" // 改为你自己代理的出站 tag
      },
      { // 广告拦截
        "type": "field",
        "domain": [
          "geosite:category-ads-all"
        ],
        "outboundTag": "block"
      },
      { // BT 流量直连
        "type": "field",
        "protocol":["bittorrent"],
        "outboundTag": "direct"
      },
      { // 直连中国大陆主流网站 ip 和 保留 ip
        "type": "field",
        "ip": [
          "geoip:private",
          "geoip:cn"
        ],
        "outboundTag": "direct"
      },
      { // 直连中国大陆主流网站域名
        "type": "field",
        "domain": [
          "geosite:cn"
        ],
        "outboundTag": "direct"
      }
    ]
  }
}
[root@dev-of-v2ray-20 src]# systemctl start v2ray
测试网关设备是否能用梯子,有以下内容返回,则说明网关设备能正常是用梯子了
[root@dev-of-v2ray-20 src]# curl -x socks5://127.0.0.1:1080 google.com
<HTML><HEAD><meta http-equiv="content-type" content="text/html;charset=utf-8">
<TITLE>301 Moved</TITLE></HEAD><BODY>
<H1>301 Moved</H1>
The document has moved
<A HREF="http://www.google.com/">here</A>.
</BODY></HTML>
中期工作
重启网关设备并关闭 iptables
[root@dev-of-v2ray-20 src]# init 6
[root@dev-of-v2ray-20 ~]# systemctl stop iptables
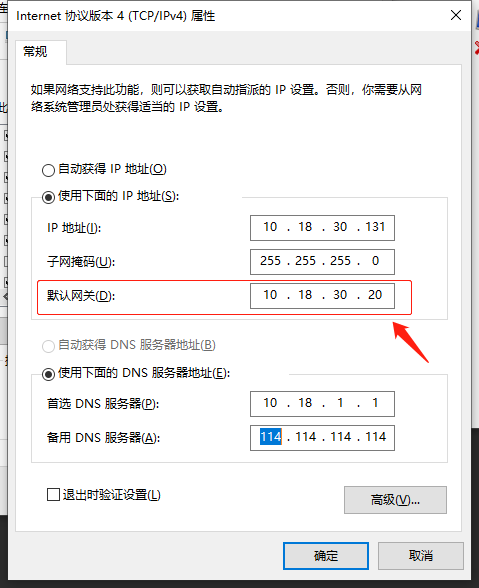
在局域网内 PC 机配置 IP 地址信息,网关指向网关设备,看是否能正常上网
回到网关设备,开启网关设备 iptables 防火墙和配置 iptables 规则
[root@dev-of-v2ray-20 ~]# cd /usr/local/src/
[root@dev-of-v2ray-20 src]# vim Trroxy.sh
# 设置策略路由
ip rule add fwmark 1 table 100
ip route add local 0.0.0.0/0 dev lo table 100

# 代理局域网设备
iptables -t mangle -N V2RAY
iptables -t mangle -A V2RAY -d 127.0.0.1/32 -j RETURN
iptables -t mangle -A V2RAY -d 224.0.0.0/4 -j RETURN
iptables -t mangle -A V2RAY -d 255.255.255.255/32 -j RETURN
iptables -t mangle -A V2RAY -d 10.18.30.0/24 -p tcp -j RETURN
# 直连局域网,避免 V2Ray 无法启动时无法连网关的 SSH,如果你配置的是其他网段(如 10.x.x.x 等),则修改成自己的
iptables -t mangle -A V2RAY -d 10.18.30.0/24 -p udp ! --dport 53 -j RETURN
# 直连局域网,53 端口除外(因为要使用 V2Ray 的 DNS)
iptables -t mangle -A V2RAY -p udp -j TPROXY --on-port 12345 --tproxy-mark 1
# 给 UDP 打标记 1,转发至 12345 端口
iptables -t mangle -A V2RAY -p tcp -j TPROXY --on-port 12345 --tproxy-mark 1
# 给 TCP 打标记 1,转发至 12345 端口
iptables -t mangle -A PREROUTING -j V2RAY
# 应用规则

# 代理网关本机
iptables -t mangle -N V2RAY_MASK
iptables -t mangle -A V2RAY_MASK -d 224.0.0.0/4 -j RETURN
iptables -t mangle -A V2RAY_MASK -d 255.255.255.255/32 -j RETURN
iptables -t mangle -A V2RAY_MASK -d 10.18.30.0/24 -p tcp -j RETURN
# 直连局域网,避免 V2Ray 无法启动时无法连网关的 SSH,如果你配置的是其他网段(如 10.x.x.x 等),则修改成自己的
iptables -t mangle -A V2RAY_MASK -d 10.18.30.0/24 -p udp ! --dport 53 -j RETURN
# 直连局域网,53 端口除外(因为要使用 V2Ray 的 DNS)
iptables -t mangle -A V2RAY_MASK -j RETURN -m mark --mark 0xff
# 直连 SO_MARK 为 0xff 的流量(0xff 是 16 进制数,数值上等同与上面 V2Ray 配置的 255),此规则目的是避免代理本机(网关)流量出现回环问题
iptables -t mangle -A V2RAY_MASK -p udp -j MARK --set-mark 1
# 给 UDP 打标记 1,转发至 12345 端口
iptables -t mangle -A V2RAY_MASK -p tcp -j MARK --set-mark 1
# 给 TCP 打标记 1,转发至 12345 端口
iptables -t mangle -A OUTPUT -j V2RAY_MASK
# 应用规则
[root@dev-of-v2ray-20 src]# chmod 755 Trroxy.sh && bash Trroxy.sh
[root@dev-of-v2ray-20 src]# iptables -nL -t mangle
Chain PREROUTING (policy ACCEPT)
target     prot opt source               destination
V2RAY      all  --  0.0.0.0/0            0.0.0.0/0

Chain INPUT (policy ACCEPT)
target     prot opt source               destination

Chain FORWARD (policy ACCEPT)
target     prot opt source               destination

Chain OUTPUT (policy ACCEPT)
target     prot opt source               destination
V2RAY_MASK  all  --  0.0.0.0/0            0.0.0.0/0

Chain POSTROUTING (policy ACCEPT)
target     prot opt source               destination

Chain V2RAY (1 references)
target     prot opt source               destination
RETURN     all  --  0.0.0.0/0            127.0.0.1
RETURN     all  --  0.0.0.0/0            224.0.0.0/4
RETURN     all  --  0.0.0.0/0            255.255.255.255
RETURN     tcp  --  0.0.0.0/0            10.18.30.0/24
RETURN     udp  --  0.0.0.0/0            10.18.30.0/24        udp dpt:!53
TPROXY     udp  --  0.0.0.0/0            0.0.0.0/0            TPROXY redirect 0.0.0.0:12345 mark 0x1/0xffffffff
TPROXY     tcp  --  0.0.0.0/0            0.0.0.0/0            TPROXY redirect 0.0.0.0:12345 mark 0x1/0xffffffff

Chain V2RAY_MASK (1 references)
target     prot opt source               destination
RETURN     all  --  0.0.0.0/0            224.0.0.0/4
RETURN     all  --  0.0.0.0/0            255.255.255.255
RETURN     tcp  --  0.0.0.0/0            10.18.30.0/24
RETURN     udp  --  0.0.0.0/0            10.18.30.0/24        udp dpt:!53
RETURN     all  --  0.0.0.0/0            0.0.0.0/0            mark match 0xff
MARK       udp  --  0.0.0.0/0            0.0.0.0/0            MARK set 0x1
MARK       tcp  --  0.0.0.0/0            0.0.0.0/0            MARK set 0x1
[root@dev-of-v2ray-20 src]# service iptables save
后期工作
重启一下 v2ray 和 iptables
[root@dev-of-v2ray-20 src]# systemctl restart v2ray && systemctl restart iptables.service
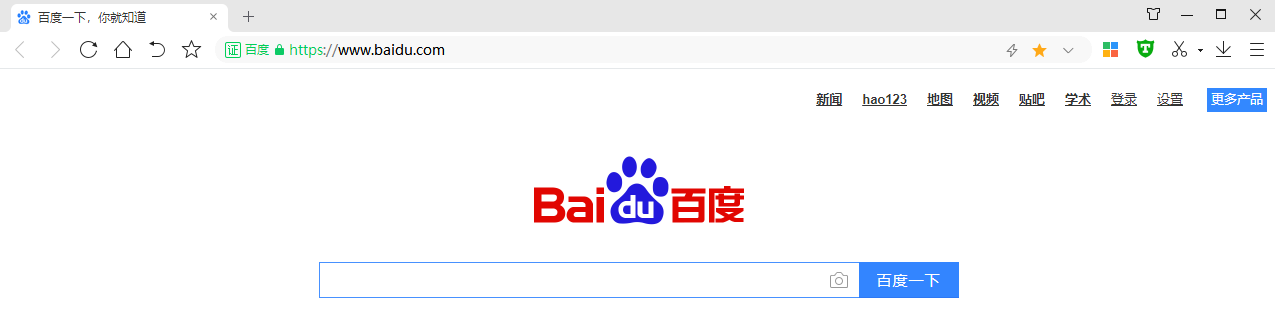
回到局域网内 PC 机测试是否可以正常使用梯子

配置局域网 DHCP 服务器分配的网关为网关设备 IP 地址,使局域网内机器获取到的网关地址均为网关设备的 IP 地址
[root@prod-of-dhcp-6 ~]# cat /etc/dhcp/dhcpd.conf
subnet 10.18.30.0 netmask 255.255.255.0 {
                range 10.18.30.11 10.18.30.199;
                option domain-name "wifi.cf.local";
                option routers 10.18.30.20;
}
局域网内设备先断网,再联网,从 DHCP 服务器中重新获取地址,会发现网关变成了网关设备的 IP 地址了
此时,就实现了局域网内全局自动使用梯子的需求啦~
至于如何判断哪些地址走梯子,哪些地址走普通线路,是通过你要访问的地址的 IP 来决定的,当你访问的地址的 IP 是国外 IP,就会自动走梯子,当你访问的地址的 IP 是国内 IP,就会走普通线路。
扩展
优化 v2ray 配置文件,避免出现 too many open files 问题
[root@dev-of-v2ray-20 ~]# vim  /etc/systemd/system/v2ray.service
[Unit]
Description=V2Ray Service
After=network.target
Wants=network.target

[Service]
# This service runs as root. You may consider to run it as another user for security concerns.
# By uncommenting the following two lines, this service will run as user v2ray/v2ray.
# More discussion at https://github.com/v2ray/v2ray-core/issues/1011
# User=v2ray
# Group=v2ray
Type=simple
PIDFile=/run/v2ray.pid
ExecStart=/usr/bin/v2ray/v2ray -config /etc/v2ray/config.json
Restart=on-failure
# Don't restart in the case of configuration error
RestartPreventExitStatus=23

#新增以下两句配置
LimitNPROC=500
LimitNOFILE=1000000

[Install]
WantedBy=multi-user.target
[root@dev-of-v2ray-20 ~]# systemctl daemon-reload && systemctl restart v2ray
参考资料
透明代理(TPROXY)
透明代理(REDIRECT)
安装 V2Ray
SS 最佳的替代品,从 0 开始部署 v2ray 梯子(1)
SS 最佳的替代品,从 0 开始部署 v2ray 梯子(2)